


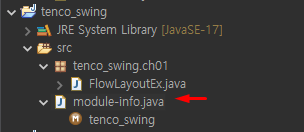
1. 새 프로젝트 생성
프로젝트명 tenco_swing
tenco_swing.ch01 패키지 안에 새로운 클래스 생성
클래스명 FlowLayoutEx
--- 기본적으로 세팅 해주고 시작할 코드형식 ---
package swing;

import javax.swing.JFrame;

public class FlowLayoutEx extends JFrame {

	// 생성자
	public FlowLayoutEx() {
		super.setTitle("FlowLayout 연습");
		super.setSize(500, 500);
		super.setVisible(true);
		super.setDefaultCloseOperation(JFrame.EXIT_ON_CLOSE);

		// 생성자에서 메서드 호출 가능
		initData();
		setInitLayout();
	}

	// 멤버 변수를 초기화 하는 기능
	public void initData() {

	}

	// 컴포넌트들을 배치하는 기능
	public void setInitLayout() {

	}
}
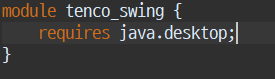
위 사진 처럼 세팅해주지 않으면 JFrame 상속했을 때 오류남
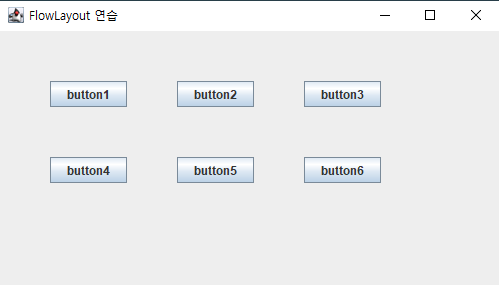
2. 배치 관리자 FlowLayout
버튼 6개 만들어서 띄워보기
package ch01;

import java.awt.FlowLayout;

import javax.swing.JButton;
import javax.swing.JFrame;

// Swing -> 배치 관리자 : FlowLayout
// 컴포넌트들을 (버튼, 라벨) 등을 수평, 수직으로 배치를 해주는 클래스이다.

public class FlowLayoutEx extends JFrame {

	private JButton button1;
	private JButton button2;
	private JButton button3;
	private JButton button4;
	private JButton button5;
	private JButton button6;

	// 생성자
	public FlowLayoutEx() {
		super.setTitle("FlowLayout 연습");
		super.setSize(500, 500);
		super.setVisible(true);
		super.setDefaultCloseOperation(JFrame.EXIT_ON_CLOSE);

		// 생성자에서 메서드 호출 가능
		initData();
		setInitLayout();

	}

	// 멤버 변수를 초기화 하는 기능(값 넣다)
	public void initData() {
		button1 = new JButton("button1");
		button2 = new JButton("button2");
		button3 = new JButton("button3");
		button4 = new JButton("button4");
		button5 = new JButton("button5");
		button6 = new JButton("button6");
	}

	// 컴포넌트들을 배치하는 기능
	public void setInitLayout() {
		// 배치 관리자 --> BorderLayout 이라는 배치관리자가 기본으로 활용된다.
		// FlowLayout flowLayout = new FlowLayout();
		// setLayout(flowLayout);

		// 배치관리자 생성 및 JFrame 셋팅
		super.setLayout(new FlowLayout(FlowLayout.LEADING, 50, 50)); // 배치관리자 --> FlowLayout

		// 컴포넌트들을 붙이다.
		super.add(button1);
		super.add(button2);
		super.add(button3);
		super.add(button4);
		super.add(button5);
		super.add(button6);
	}

	// 코드 테스트
	public static void main(String[] args) {
		// FlowLayoutEx f1 = new FlowLayoutEx(); <----- 부를 수 있는 이름이 있는 상태
		new FlowLayoutEx(); // <----- 익명 클래스
		// 다시 접근해서 사용할 일 없으면 생성만 해도됨.

	} // end of main

}
습관 들이기
ctrl + T 로 상속관계를 모두 확인
ctrl + 좌클릭 으로 원시코드 확인
매개변수로 어떤 타입을 넣어줘야 하는지, 다형성을 이용해서 어떤 타입으로도 쓸 수 있는지 알 수 있고
미리 설정된 상수 값을 볼 수 있음
코드 리팩토링 - 배열과 반복문을 활용해서 코드를 수정하시오.
package ch01;

import java.awt.FlowLayout;

import javax.swing.JButton;
import javax.swing.JFrame;

public class FlowLayoutEx2 extends JFrame {

	// 배열 활용
	private JButton[] buttons;

	// 생성자
	public FlowLayoutEx2() {
		super.setTitle("FlowLayout 연습");
		super.setSize(500, 500);
		super.setVisible(true);
		super.setDefaultCloseOperation(JFrame.EXIT_ON_CLOSE);

		// 생성자에서 메서드 호출 가능
		initData();
		setInitLayout();

	}

	// 멤버 변수를 초기화 하는 기능(값 넣다)
	public void initData() {
		buttons = new JButton[6];
		// 반복문 활용
		for (int i = 0; i < buttons.length; i++) {
			buttons[i] = new JButton("button" + (i + 1));
		}
	}

	// 컴포넌트들을 배치하는 기능
	public void setInitLayout() {

		// 배치관리자 생성 및 JFrame 셋팅
		super.setLayout(new FlowLayout(FlowLayout.LEADING, 50, 50)); // 배치관리자 --> FlowLayout

		// 컴포넌트들을 붙이다.
		// 반복문 활용
		for (int i = 0; i < buttons.length; i++) {
			super.add(buttons[i]);
		}
	}

	// 코드 테스트
	public static void main(String[] args) {
		new FlowLayoutEx2(); // <----- 익명 클래스

	} // end of main

}
3. 배치 관리자 BorderLayout
package ch01;

// ctrl shift O 는 안쓰는 import 삭제
import java.awt.BorderLayout;

import javax.swing.JButton;
import javax.swing.JFrame;

public class BorderLayoutEx1 extends JFrame{

	// 생성자
	public BorderLayoutEx1() {


		initData();
		setInitLayout();
	}

	public void initData() {
		setTitle("borderLayout 연습");
		setSize(600, 600);
		setVisible(true);
		setDefaultCloseOperation(JFrame.EXIT_ON_CLOSE);
	}

	public void setInitLayout() {
		// 배치 관리자 선정 (컨테이너)
		// BorderLayout -- 컴포넌트들을 동서남북가운데로 배치 시켜주는 레이아웃이다.
		setLayout(new BorderLayout());

		add(new JButton("동"), BorderLayout.EAST);
		add(new JButton("서"), BorderLayout.WEST);
		add(new JButton("남"), BorderLayout.SOUTH);
		add(new JButton("북"), BorderLayout.NORTH);
		add(new JButton("센터"), BorderLayout.CENTER);
	}

	public static void main(String[] args) {
		new BorderLayoutEx1();
	}
}
코드 리팩토링 - 배열과 반복문을 활용해서 코드를 수정하시오.
package ch01;

// ctrl shift O 는 안쓰는 import 삭제
import java.awt.BorderLayout;

import javax.swing.JButton;
import javax.swing.JFrame;

public class BorderLayoutEx2 extends JFrame{

	final int WIDTH = 600;
	final int HEIGHT = 600;
	JButton[] buttons;
	String[] directions = {BorderLayout.EAST, BorderLayout.WEST, BorderLayout.SOUTH, BorderLayout.NORTH, BorderLayout.CENTER};

	// 생성자
	public BorderLayoutEx2() {

		initData();
		setInitLayout();
	}

	public void initData() {
		setTitle("borderLayout 연습");
		setSize(WIDTH, HEIGHT);
		setVisible(true);
		setDefaultCloseOperation(JFrame.EXIT_ON_CLOSE);

		buttons = new JButton[directions.length];
	}

	public void setInitLayout() {
		// 배치 관리자 선정 (컨테이너)
		// BorderLayout -- 컴포넌트들을 동서남북가운데로 배치 시켜주는 레이아웃이다.
		setLayout(new BorderLayout());

		// 반복문을 활용해서 코드를 완성
		for (int i = 0; i < buttons.length; i++) {
			add(new JButton(directions[i]), directions[i]);
		}
	}

	public static void main(String[] args) {
		new BorderLayoutEx2();
	}
}
'Java > Swing 프로젝트' 카테고리의 다른 글
| Swing Key Listener - 6 (0) | 2024.04.30 |
|---|---|
| Swing 이벤트 리스너 - 5 (0) | 2024.04.29 |
| Swing image 위에 image - 4 (0) | 2024.04.29 |
| Swing image 출력 - 3 (0) | 2024.04.29 |
| Swing 기초연습 - 2 (0) | 2024.04.26 |